Pages

Friday, June 29, 2012

What to Make with 50g of Sock Yarn

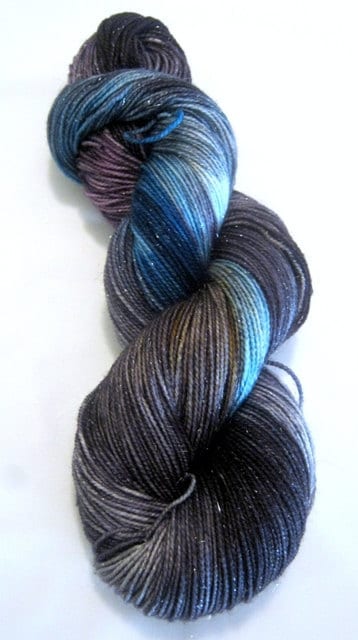
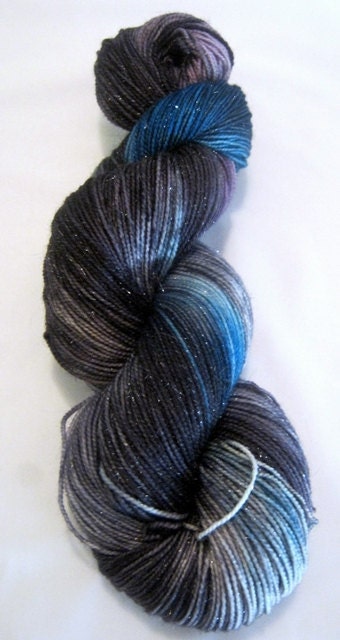
Hello, and welcome to another edition of What to Knit with ______ here on the Storied Yarns blog! In a few minutes I will be updating the Storied Yarns Shop with these nine lovely skeins of sock yarn:


Each of these skeins is on my Colonial Sock base (75% SW Colonial Wool/25% Nylon) and each one weighs in at 50g.

So, what exactly CAN you make with only 50g of sock yarn? If you think "not much," you're sadly mistaken! 

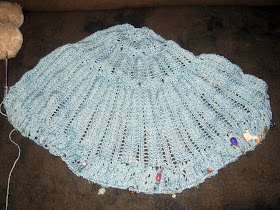
Personally, I have made a handful of projects with only 50g of sock yarn. How about a Swirl Hat? Here's one I made for my friend's baby about two years ago:

This is my "Medusa" colorway, if you're curious.

For some other hat suggestions, why not the Ishbel Beret by Ysolda Teague or the HitchHat by Martina Behm?

I also made a really fun pair of fingerless mitts out of 50g of sock yarn in my "Party Ponies" colorway:

The pattern is the Quilted Lattice Mitts, and it was a lot of fun to make! You can do a 2-color version or a single color version as I did. Fingerless gloves can often be made with only 50g of sock yarn. For a different pair, try Veyla, Lepidoptera Mitt (Oh wow I love these!) or CanCans on for size!

I have a pattern for you hookers out there - it's my Crocheted Adjustable Scowl. My friend Carrie made this one in my Mrs. O'Leary colorway:

If you want a cowl but you prefer to knit it, why not the lovely Abstract Leaves Cowl or A Very Good Cowl Indeed?

For all you shawl lovers out there, a pattern I have long admired, yet never made, is the Storm Cloud Shawlette. It's a FREE pattern and it looks lovely in a nice, variegated yarn. The best part is it uses 150-200 yards of fingering weight yarn, huzzah! I think if all the yarns in my shop don't sell there will be a Storm Cloud in my future and maybe a pair of Lepidoptera Mitts, too!

Don't forget all the lovely baby items you can make with 50g of sock yarn - just TRY to look at Christine's Stay-On Baby Booties or Cable Baby hat and not go "Awwww!" I dare you!

I also dare you to give 50g of sock yarn a try. The ones I'm adding to my shop sell for just 10 bucks a pop, so for a low budget and a little bit of time you can make a truly beautiful item for yourself or a loved one. It's a win-win!

Tuesday, June 26, 2012

Craftaholics Anonymous Swap

This year I happened to notice that someone I follow on Twitter (I can't remember who it was now, sorry!) posted about an upcoming event called the Craftaholics Anonymous Handmade Gift Exchange. The main idea is that you get a secret person to spoil and you make a handmade gift just for that special person and send it off to them. I only had about a day before the deadline so I jumped right in, and I'm glad I did!


Linda of Craftaholics Anonymous used Elfster to match us up. I was given the opportunity to spoil a lovely crafter in California! She hasn't received her package yet so I won't say anything more about that here.

I was able to find her Pinterest account (she posted a link to it on Elfster) so I used that to give me inspiration for her handmade gift. She had a lot of party decorations pinned, so I decided to make a "party in a box" for her gift.

I started with a cake stand, inspired by this one and others flooding the pin boards. One decorative melamine plate, one plastic sundae cup and a little Gorilla Glue and this baby is finished!


I used the bright colors in the plate to inspire the rest of the package, focusing on blue and orange with accents of pink, green and blue. The next thing I made was a flag banner:


I cut the flags out of my stash of scrap fabrics, added felt backing for stability and sewed a felt circle to the center of each one. I used double fold bias tape to connect the banner together and puffy paint to write "PARTY" on the flags. I figure it's both festive and gender-neutral for any occasion.

The last thing I made was a little wall plaque. My recipient said she enjoyed reading the Bible and there were a lot of crafty quote plaques in her Pinterest boards, so I made one for her:

I simply painted a plain wooden plaque from the craft store with blue paint, then added an orange border and a quote with an orange paint pen. I sprayed the whole thing with clear coat to protect it, so you're getting a bit of flash reflection going on in that photo, sorry about that!

I also included a note and some fun little extras and this morning I sent the package off! It felt strange to be making a handmade gift that had nothing to do with yarn (what would a Californian do with hand-knits in July, I ask you?), but it was really fun, too! I enjoyed thinking outside the box in order to fill a box for my special recipient, and I hope she loves it!

I've heard from my spoiler that my package is in the works and I'm excited to see it! I'll be sure to post here and show off what I get!

If you'd like to join this swap, Linda hosts one twice a year so stay tuned to Craftsaholics Anonymous (a favorite new blog of mine) to find out when the next one will start!

Friday, June 22, 2012

Pattern Pairings: Stock Characters

I dyed up some more of my Stock Characters this week, and I'm pretty excited about them! You can find them in the Storied Yarns shop. I thought it might be nice to give you some inspiration about what you might do with them!

I've been seeing a lot of excitement over the Color Affection Shawl pattern lately. Some of my friends have made some truly gorgeous versions of this shawl! I think The Handmaiden, The Knight in Shining Armor and The Wizard would make a REALLY cool rendition of this pattern:


There are also quite a few two-color shawls and patterns that I've been crushing on lately. How about Cladonia, Spectra or Kleio in Wizard and Knight in Shining Armor?

If shawls aren't your thing, how about the Tempest sweater, Endpaper Mitts or Disappearing Act socks in Evil Queen and Handmaiden?


Evil Queen also pairs up nicely with Knight in Shining Armor, don't you think?


Another fun combination is to pair The Princess with The Handmaiden:


or with Evil Queen:


This combination (since the Princess skein is 68g) would be amazing for the Whippoorwill Shawl, Fracture or Zenobia.

Pretty soon I'll have this shawl finished and ready to publish:


And once I do, I'll have a new pattern to recommend for you! ;)

Happy Fiber Friday, everyone!!!

Monday, June 18, 2012

Free Crochet Pattern: Cozy Milk Forever

Today I present a re-creation of a free crochet pattern I used to have on another site. It has since been taken down and I had a request for the pattern on Ravelry, so here it is!

Cozy Milk Forever
Free Crochet Pattern for Baby Bottle Cozies
by Jessica Cook of Storied Yarns


Materials:
- Worsted/Aran weight cotton yarn
 (samples used Lion Brand Nature's Choice Organic Cotton in Walnut, Blueberry and Dusty Blue)
- Crochet hook size US I (5.5mm)

Note: For the samples, 1 skein of the LB cotton (106 yards per skein) was enough for two cozies.

Directions:
Round 1 - Begin with a magic adjustable ring. Make 5 sc stitches in the ring. Do not join; just place a removable stitch marker on the first stitch of the round and move it up as you proceed to subsequent rounds.
Round 2 - 2 sc sts in every st around
Round 3: 2sc in the first st, sc in the next st; repeat around
Round 4: 2sc in the first st, sc in each of the next 2 sts; repeat around
Round 5: 2sc in the first st, sc in each of the next 3 sts; repeat around
NOTE: Continue to increase in this manner until the circle you are making is approximately the same size as the circumference of the bottle. For the Born Free bottles I made mine for, the circumference was 8 inches.

Next Round: Make one sc in the back loops of every st around (this helps to keep the base flat)
Following round: sc in every st around (both loops)
Repeat this last round until the cozy is tall enough to cover the bottle just past the neck (but not interfering with the nipple). If you like, switch to a contrasting color for the top round. Fasten off.

Make the drawstring: Make a chain length that is twice the circumference of the bottle. Fasten off. Use a darning needle or your crochet hook to weave the chain length in and out of the stitches in the second row down from the top of the cozy. Use this to keep the cozy snug around the neck of the bottle.

Enjoy!

Please feel free to use this pattern for yourself, to crochet gifts or to crochet items to sell. All I ask is that you do not try to sell the pattern itself and that you do not copy the pattern somewhere else. If you want to refer to the pattern publicly, please link people back to this page. Thank you!!

Wednesday, June 13, 2012

In which we interrupt this fiber blog with a post about vegan dessert

Ok, so normally I talk about yarn and fiber. And sometimes general crafting. Today, though, I have a recipe to share!

I'm sure my sister would be falling out of her chair if she were reading this, because let's just say I am NOT the person in my family to have the cooking gene. Normally I don't enjoy cooking at all, but when there's dessert involved then I'm all for it.

I should premise this post by saying that I have my own personal brand of vegan-ism. I'm not here to turn this into a vegan-centric blog and I don't really want to spend a lot of time talking about my dietary choices. Suffice it to say that I'm trying hard not to ingest dairy foods just so I can get fat, and that means no more ice cream for me.

We bought an ice cream maker and attempted to make vegan style ice cream by substituting the milk in the standard recipe for almond milk and the cream for vegan creamer. It turned out mostly mushy and not very good. I have big issues with food texture and this was just wrong on so many levels. I had almost given up on the idea of ever having frozen, creamy dessert again.

Then, inspiration struck. I got a coupon mailer with a smoothie recipe in it, and it got me to thinking that a smoothie put into an ice cream maker might make for some really good sorbet. From that idea, this recipe was born. I hope you'll use it, tweak it, modify it, and ENJOY it!

How to Make Vegan Fruit Sorbet

Directions:
- Fill your blender with one sliced banana, a large handful of frozen fruit (I used peaches because that's what I had on hand; I think pineapples would be ahh-mazing) and a can of creme of coconut (available in the liquor/mixers aisle at the grocery store).
- Blend until super smooth.
- Pour the blender contents into your ice cream maker and turn it on. Wait the amount of time you normally have to wait for the ice cream to form.
- Eat and enjoy!

I think this recipe would be great with pineapples, as I said. I also think it would be nice to add nuts, shredded coconut or other goodies. I used two bananas in the original recipe and that turned out to be a little heavy on the banana flavor for me, so I hope it still works out, texture-wise, with only one.

Another good thing about this recipe is that there were only 110 calories in the entire can of creme of coconut that I used, so that plus fruit gives you a pretty low calorie content for a VERY sweet dessert!

Sunday, June 10, 2012

Quick and Easy Yarn Gift: Wire Core Bracelets

I'm having a lot of fun with a new project - spinning bracelets! Do you want to see the ones I made?


I attended the Middle Tennessee Fiber Festival a few weekends ago, and I picked up a wire core bracelet kit from Moonwood Farm. It looked like this:

It contained three mini batts (gorgeous, luxurious Roo batts!), a spool of jewelry wire and a strand of beads. I could hardly wait to get these babies on my wheel!

Here's how to spin your own, if you're so inclined!

1. Pick up a bracelet spinning kit like mine from Moonwood Farm. (Note: I see she doesn't have any in stock but I'm sure she could put one together for you if you ask her nicely.) OR make your own by just acquiring some jewelry wire, mini batts and beads (the beads are entirely optional).

2. Start spinning one of the batts on your wheel as a relatively thin single. Spin for a few inches.

3. Bend the end of the wire over onto itself to protect you from the sharp, cut end. Insert the wire into the middle of the fiber you're about to spin as if you were going to core-spin it (which you are).

3. Core-spin around the wire. Helpful Hint: When I first got the fiber turning around the wire and got the wire itself to spin, it took a lot of work and the stuff I had already spun got pretty over-twisted, but that's okay; it all works out in the end.

4. Continue to core-spin around the wire and wrap the wire onto your bobbin as you go. Mine just wound right on there, but you may have to pause and help it along with your hands.

5. When you're almost out of fiber, cut the wire. I just used scissors because my wire was fairly thin/pliable. Bend the cut in over onto the main body of the wire as you did at the beginning.

6. Continue to spin the fiber itself as a single until you run out.

7. Unwind the bracelet from your bobbin. Coil it around itself to make it large enough to easily slide onto your wrist without being so large as to fall off. You can leave it like that if you wish, and it will be an open coil bracelet. In that case, use a little hot water on the ends and rub them with your fingers to wrap the fiber-only strands around the ends of the wire to keep the wire hidden. Option B here is to do what I did - wrap the fiber-only ends around all of the coils to secure them together, then wet felt with your fingers and hot water to secure the connection (see my photo above to see how that looks).

8. Wear your bracelet or give them as gifts! These are SUPER fast - maybe 10 to 15 minutes of time per bracelet. I plan to make several and hold onto them for future swaps and holidays!


Optional Beads (as in the pink one in the top photo):

If your bracelet is thin enough and your beads are large enough, you can probably string them on after spinning. In my case the wool was too thick for these beads, so I strung them onto the wire itself before spinning. Then I'd core-spin for a while and pause, pulling up a bead. I'd sort of core-spin the fiber around the bead to hold it in place on the wire and then keep going. This is a fun way to add a little extra bling to your bracelets!

Tips:
- Use wool-blend fibers so you can felt the ends when you're finished.
- In my experience this worked really well with super smooth mini batts (approx. 1/4 ounce per bracelet). I'm not sure the same would be true with chunky art batts, which might not secure themselves around the wire as easily, but it might be worth a try!

Friday, June 8, 2012

Color Inspiration: Stock Characters

Happy Friday, everyone! It's time for another post of color inspiration stories!

Today I want to introduce my new line of semisolid colorways - the Stock Characters line! Here are the first few colorways and the stories behind them:

This electric-blue skein is called The Time Traveler. It's bold and adventurous; a blend of royal blue with a hint of turquoise for a sort of peacock blue result. Wouldn't this one be great for Bigger on the Inside?

The Ingenue is subtly gorgeous. She blends in and stands out at the same time; she's a seashell-blue shade that would make an absolutely stunning lace shawl. How about Rough Sea Shawl?

The Harlot is bold and super feminine. She's a rich, bright shade of magenta that's sure to turn heads wherever she goes. Can't you just see yourself wrapping her around your neck as a Romance scarf?


The Damsel in Distress is sweet and feminine. She gets herself into some tough situations but she always manages to find a brave hero to rescue her. She could find her match made in knitting heaven with a Princess Cut Diamonds scarf or even a BAD fairy princess stole!

The Vampire is a true prince of darkness. He's a rich, black cherry shade that is a customized blend of red, burgundy and black. He will lure you in with his silky smoothness and his deep tone will bring a true luxury to any knitted item. Wrap your feet in a pair of Gothic Spires Socks made out of this yarn and you may never want to get out of bed again!

All of my stock characters are custom blended colorways, so you won't find their equals in any other shop. I think these colorways would be ideal for lace or cables and would also work really well in large quantities to knit a sweater. Contact me in the Storied Yarns shop if you'd like a custom order in a larger quantity, or if you want me to dye up a custom color blend of your favorite shade!

While you're there, I just updated the shop today with plenty of rovings and yarns to suit your fancy. There are plenty of yarns and fibers to get you through a long, hot summer and you can even use the code Tdf12 to save 12%!

Happy Friday, everyone!!

Wednesday, June 6, 2012

Color Inspiration: Jareth

Today I bring you another post inspired by inspiration itself! Sometimes people ask me how I come up with the ideas for my yarn and fiber colorways.

Sometimes they don't, but I make them listen to the story anyway.

Today, I present the story behind my "Jareth" colorway. Here he is on Sparkle Sock:

Mmm, isn't he divine?!? I am so in love with this particular skein that I dyed one up for myself. More on that later.

This colorway was inspired by one of my favorite childhood movies, "Labyrinth." I have seen this movie so many times that I can nearly quote it word for word. Of course, I wanted to BE Sarah - she had a rockin' cool bedroom, an amazing collection of costumes and there was a mega-hot Goblin King in love with her. Plus, she gets to hang out with Muppets; what could be better, right?

This colorway isn't inspired by Sarah, though - it's inspired by that Goblin King. Mmmmm, yummy.


It's a kettle dyed colorway, so I never know quite what I'm going to get - the nice goblin king who takes my brother away after I wish for it to happen, or the unfair goblin king who turns the clock ahead to shorten my time in the Labyrinth? In any case, he always comes out of the dye pot looking stunningly gorgeous, don't you think?

The actual colors are tan, purple, midnight blue, grey, black and white. They are inspired by spiky rad-tastic hair, magical powers, wicked eye makeup, a fluffy white shirt and tight black pants. Ha!

You can find this skein in the Storied Yarns shop, ready to come home with you and make some magic of its own. Need a pattern recommendation? (Perhaps, What Kind of Magic Spell to Use? Hahahahaha!) I'm planning to knit Ysolda's Ishbel shawl with mine. Come and knit along with me if you want - there are several of us knitting it together on Ravelry.

Well, that's it for me today. I'm off to throw some dye at some wool for a Storied Yarns shop update later in the week. I'll try to do another inspiration post then, too, because I've got a brand-new line of semisolid colorways to show off!

XOXO,
Jess

Tuesday, June 5, 2012

Stitch a Story ... Together

If you're a regular reader of this blog, then you've already heard me say that I believe you tell a story through your handmade crafts. That's why I create colorways inspired by all of the stories we love - those colorways bring added depth to the stories you create. Now, I'm offering you an opportunity to stitch a story together with your fiber-loving friends, AND receive a discount!

Big, exciting things are happening this year at Storied Yarns Central. One of those things is that I'm now happy to introduce Group Package Deals! Basically, all you have to do is grab a group of friends and place a Storied Yarns order together and I'll let you cash in on some great savings!

Who qualifies for these group discounts, you ask? Any group of people who love to knit, crochet, spin, and weave! Whether you've got a regular Knit Night, a Stitch n' Bitch, a Ravelry group or a Fiber Arts Guild, you can get in on this awesome deal. You just need a minimum of five people to get you started.

There are two main options to explore:
  1. Themed Packages: Choose this option if you want to have a collaborative yarn or fiber experience. You choose the theme and I create the colorways. Everyone receives their choice of yarn or fiber in one colorway or a collection of colorways inspired by your theme. You can choose any theme you like that has to do with books, movies or television; possibilities include Classic Literature, Famous Female Characters, Saturday Morning Cartoons and much more! I will send out your packages, along with an extra special surprise in each one, and they will all coordinate together so you can enjoy talking about the theme as you knit and spin. This option also works well if you all want to knit or spin one particular fiber type in the colors of your choosing, or if everyone in your group wants to knit or spin one colorway on multiple bases.
  2. Co-Op Orders: This type of package works well if you want to order as a group and save money but you don’t have one specific theme in mind. In this case each member of the group will place an order with me for any yarn or fiber that they like, and they will save money simply by ordering as a group rather than placing orders individually through my shop.  

The Discount:

You get access to some special group savings through this option, of course! Here's how that goes -
  • If your group has 5 people, you get 10% off my regular shop prices on everything in your order.
  • If your group has 6 to 10 people, save 15%.
  • For 11 or more people, save 20%
 How it Works: 
  • I will need ONE group leader or coordinator. That person will contact me with a request for more information and a basic idea of the type of package you would like to get. I will provide all the necessary information to that person. (Psst - that person also gets FREE yarn or fiber for doing the job!)
  • The group leader will send me a list of everyone in the group who wants to participate along with their PayPal e-mail addresses and their order requests. (Note: If you have a Ravelry group we can probably do this step in one of your discussion threads if you prefer.) Members can order in-stock items or custom orders; may be subject to availability.
  • I will send individual PayPal invoices to each group member. Everyone pays for his or her own order and his or her own shipping.
  • I will order supplies and dye/card/spin/whatever once I receive all orders and payments. I will work as fast as I can to fill the order and ship them all at one time.

A couple of things to consider:
  • I cannot take on too many group orders at once or I might not be able to fill them in a timely fashion. Therefore, you should try to give me as much notice as you can before you want your order so I can put you on the waiting list, if need be.
  • I will communicate with you as I complete the steps of your order so everyone will know their order status.
  • Order items may be subject to what is in stock or what I can easily order; not all of my bases are 100% available all the time, especially with yarn bases, but I will do my best to fill everyone's order as fully as I can.
 I don't want to take up too much space here making you read allllll of my ideas, but suffice it to say I have a lot of ideas for how to make this a really fun event for your fiber-loving group. 

Please send me a message on Ravelry (I'm Jessecreations there) or e-mail me at StoriedYarns [AT] Yahoo [DOT] Com if you want more information on these packages!