Anyway, we busied ourselves with filling out Valentine cards earlier in the week, and to be honest I was feeling a bit of a crafty let-down. Valentine's Day has been a DIY holiday for me since, well, forever. When I was a little girl I used to LOOOOVE buying construction paper, doilies and glitter at this time of the year and making my own Valentines instead of buying the pre-packaged ones. My own children, however, just want to buy the Fun Dip that comes with a place to write the recipient's name on the front and call it a (holi)day. Ugh.
To appease myself and my need to craft up this holiday properly, I whipped up these little bags yesterday:

First up, gather your materials.
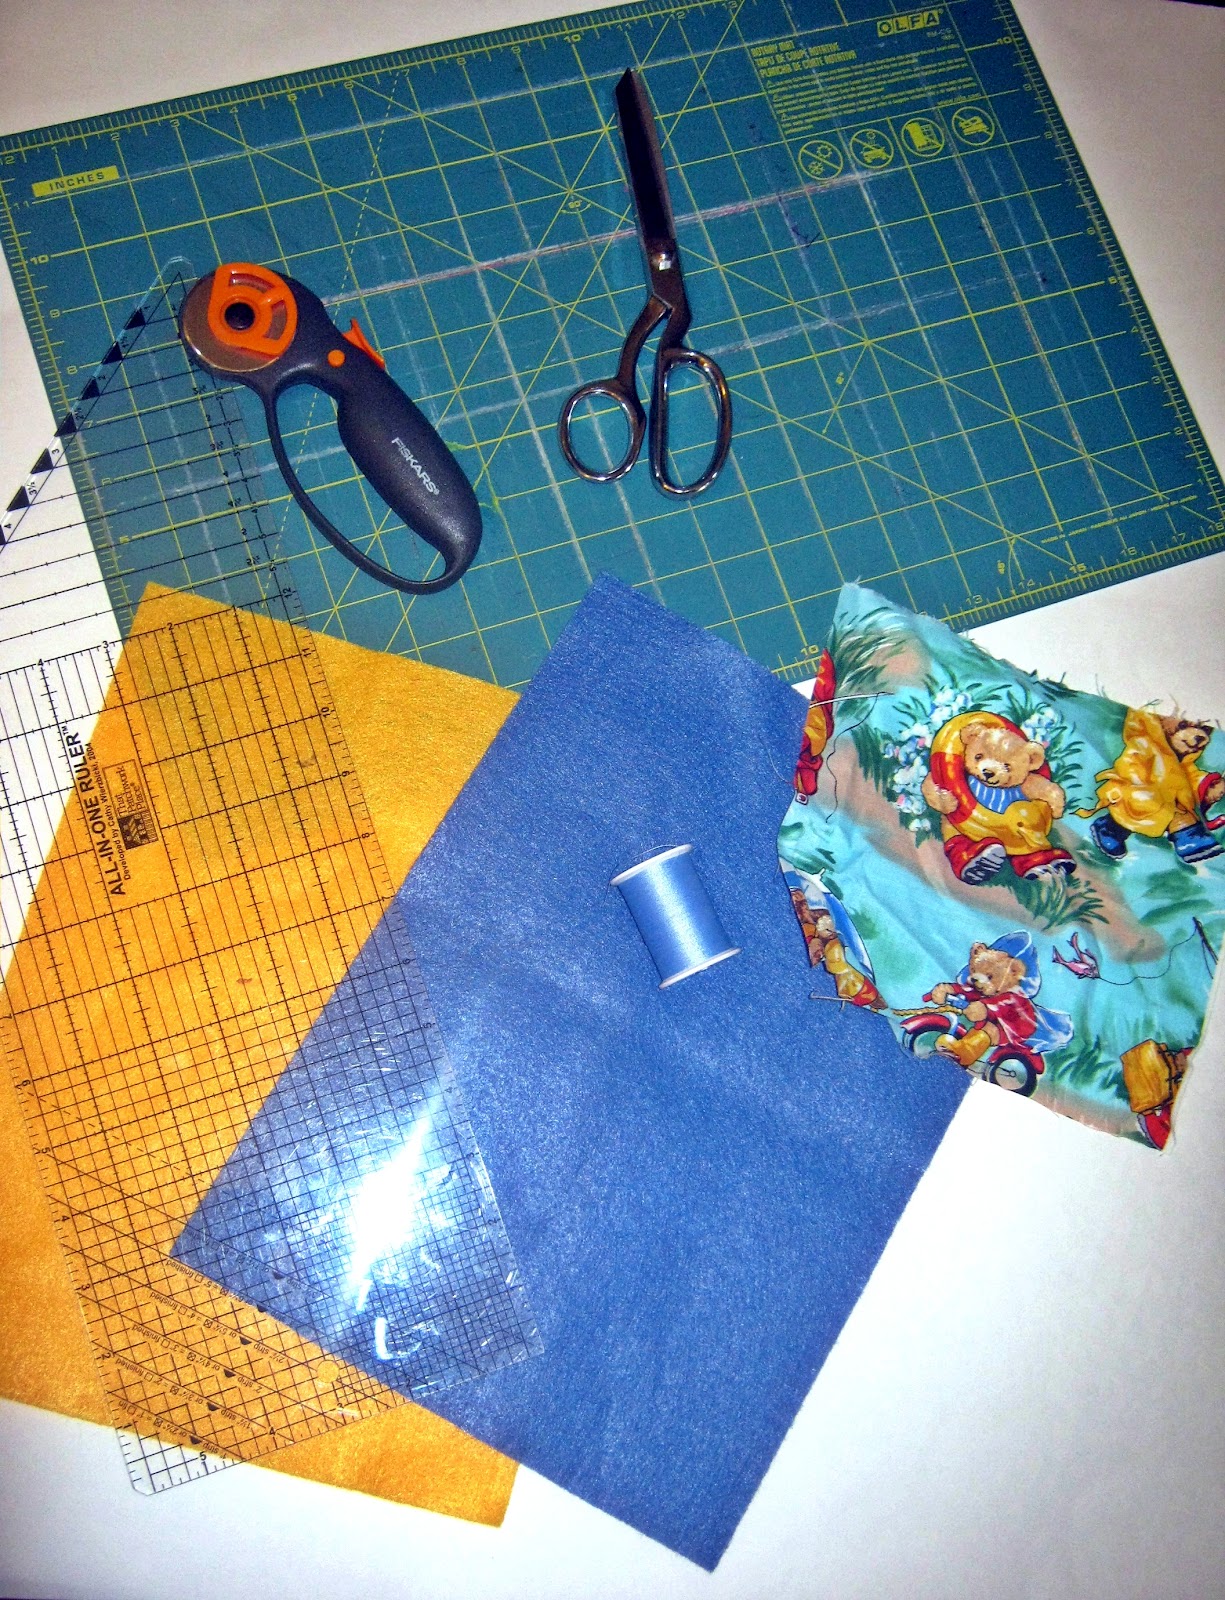
You'll need the following items:
1. Felt fabric - two 9x12 sheets will make one tote.
2. Ruler or measuring tape
3. Rotary cutter and mat (optional)
4. Scissors
5. Scrap of decorative/fun fabric
6. Coordinating thread
7. Sewing machine
8. Guard cat to make sure you're doing it right:

Moving on. Here's what you need to do to make these DIY felt tote bags:
1. Cut your felt fabric; the first sheet can be cut down in half so you get two pieces that are each 9x6.

2. The second sheet needs to be cut into four even pieces that are each 9x3:

3. Cut one of those strips in half so that you get two pieces that are each 1.5x9 and then cut one piece down so it is only 6x9 and you'll have this:

(You may be noticing that my colors aren't very Valentine-y. Well, that's because I'm a mom on a budget so I'm using the felt I have lying around, which happens to be NOT red. Plus, I figure that makes the totes more versatile for using at other times of the year, right? It also worked out well that my felt coordinates with my cotton printed fabric. See? I did it on purpose. That's my story and I'm sticking to it!)
4. Anyway, moving along. Take your scrap of cotton printed fabric and cut it into a heart shape. I just free-handed it with the old fold-it-in-half trick and it worked out just fine:

5. Pin this scrap onto one of your larger felt pieces, centered near the top, and sew around the edges of the heart with a zigzag stitch to hold it in place:

6. Sew around the edges of the heart again, but this time increase the width of your stitch to 5 (or super wide) and the length to 1. Now your heart will look like this:

7. Trace your kid's name under the heart and embroider it on there, if you like. You'll see mine in a minute.
8. Take two of the 9x3 strips and sew them, one at a time, along the 9-inch edges of the front piece. Use a straight stitch and sew with wrong sides together; these strips will become the sides of your bag. When you finish it will look like this:

9. Sew the back panel of the bag onto the other long edges of the side pieces so that you have a bag that stands up on its own and has no bottom. I forgot to take a photo of that step, sorry about that!
10. Sew the bottom strip onto the bag - this is the piece that measures 3x6. I found it was easier to sew one 3-inch seam, then the opposite 3-inch seam, then the 6-inch seams one at a time. Again, keep your seams exposed to the outside of the bag as you do this. When you finish your bag will look like this:

Here's a side view:

and an aerial view:

11. Pin one of the thin strips to the front of the bag like so to make the front handle:

12. Repeat this with the remaining thin strip and the back panel to make the back handle. Sew across the entire top front and top back of the bag with a zigzag stitch to secure the handles. (Note: I didn't feel the need to make the handles super secure because these bags only have to hold Valentine cards. If you want yours to be sturdier, sew a few extra back and forth stitches across the place where the handles physically attach to the body of the bag.) Your finished bag will look like this:

13. Make a few more for your other kids, improving your embroidering skills as you go:
Stand them up by the front door and wait for the kids to come home ...

... and find the Valentine cards they got in the mail!

I hope you enjoyed my simple sewing tutorial today! If you make one of these bags, I'd love it if you pop back in here and show me a picture! :)
This has been a presentation for Fiber Arts Friday, so head on over to Andrea's blog and check out the rest of the fun.
Happy Valentine's Day!!
oooh, way better than a shoebox. Beautiful work. I am going to get my sewing machine going...really!
ReplyDeleteThese look like a lot of fun... totally love the guard cat. :-)
ReplyDeleteHee hee... guard cat. These totes are absolutely so much fun. I'll be attempting my own as soon as I can get my sewing machine to reverse. Love it.
ReplyDeleteI love your valentine treasure bags, so cute! It was a big deal when I was in elementary too, we all made our own mailbox at home and brought it in for the big party, plus we (at our house) made our valentines like you did out of doilies and colored paper, so much fun!
ReplyDeleteYour bags look like great fun to make and I'm sure they'll make for treasured memories for years to come.
ReplyDelete